Year 8 Tutorials
Back

2D Design Basics

Vectorising an Image

Making Jigsaws

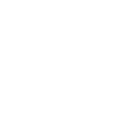
When using computer aided design and
manufacture, we need to convert
normal ‘raster’ images (made of pixels) into images made of lines,
called ‘vector’ images (made using mathmatical equations, such as when you draw lines with a graph).
This is because the laser cutter can only
read the lines in vector images, so that it knows where to cut and engrave.
Look
at the examples to the left.
When selected, the original raster
image selects the entire rectangle.
The laser cutter just sees this as a
rectangle shape and
it can’t tell what’s in the image.
When you convert it to a vector
image, only the black parts of the image are left. (Notice how you can see the
dots through it?)
The laser cutter now knows where to
engrave or cut.
So, how do you do it?
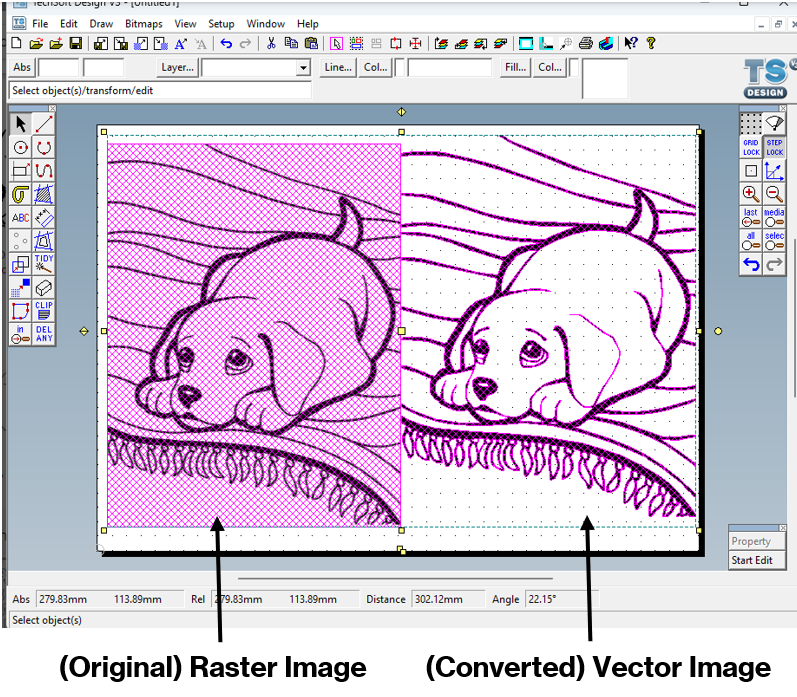
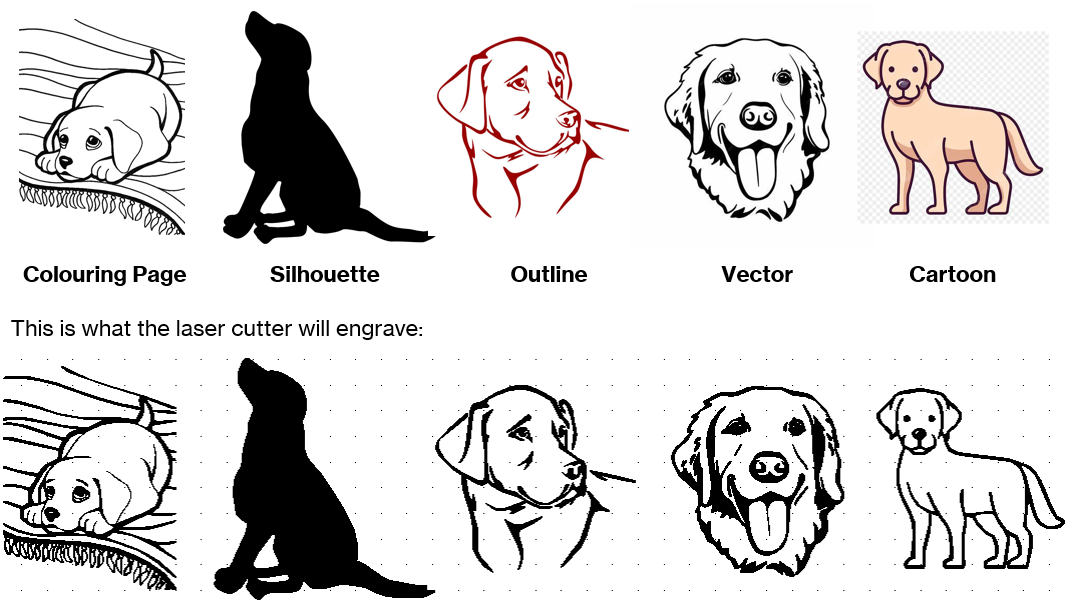
The best images to use are simple
images without much colour.
They should have bold and clear outlines. Try
looking for the following on an image search (I got my example by searching
‘labrador colouring page’):
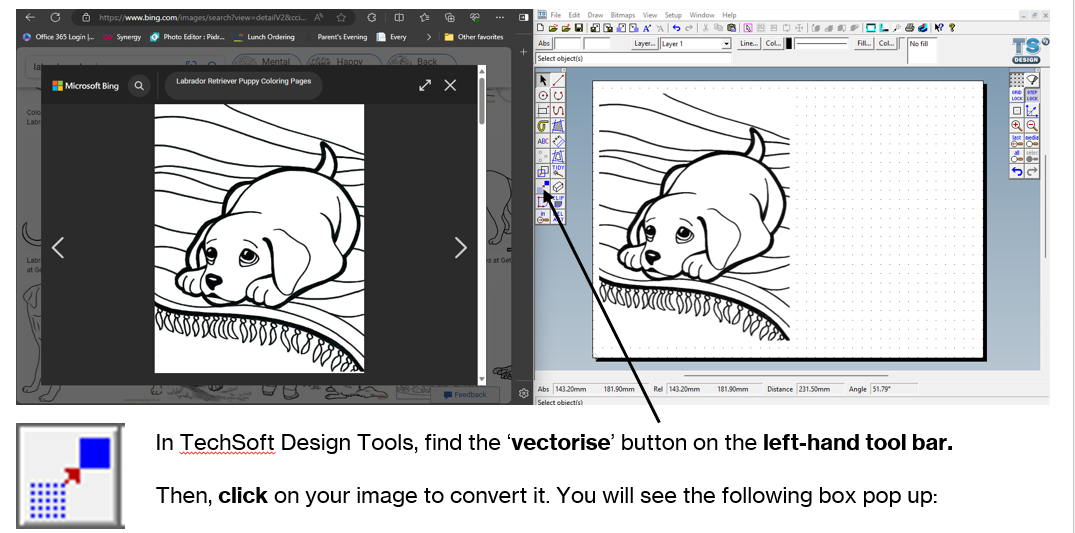
Open TechSoft Design Tools, then find a suitable image
from an image search. Make sure you click on the image to make it the biggest
you can, the bigger the image, the better the
quality.
Copy the image and paste it
into TechSoft
Design Tools.
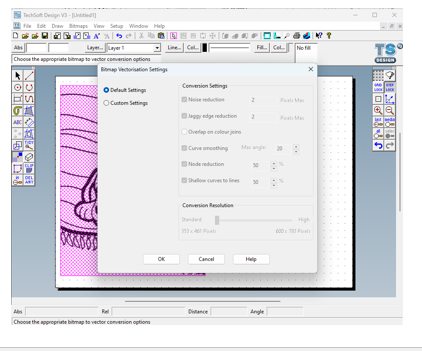
Ignore the next box that pops up, and
simply press ‘OK’, and you’re done!
Keep practicing this skill (the
more you do it, the longer you remember it for!) by making your own original
picture using a collage of at least 5 different vectorised pictures.
If you complete this, try turning them
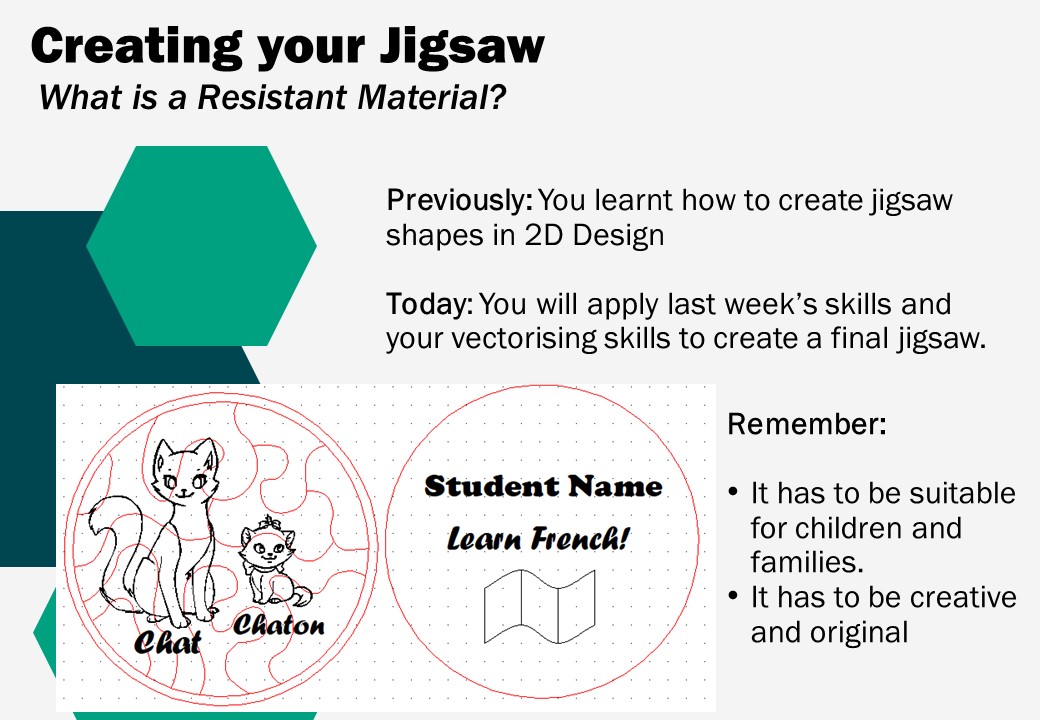
into a final jigsaw design!
Don’t forget to save your work into
your one drive!
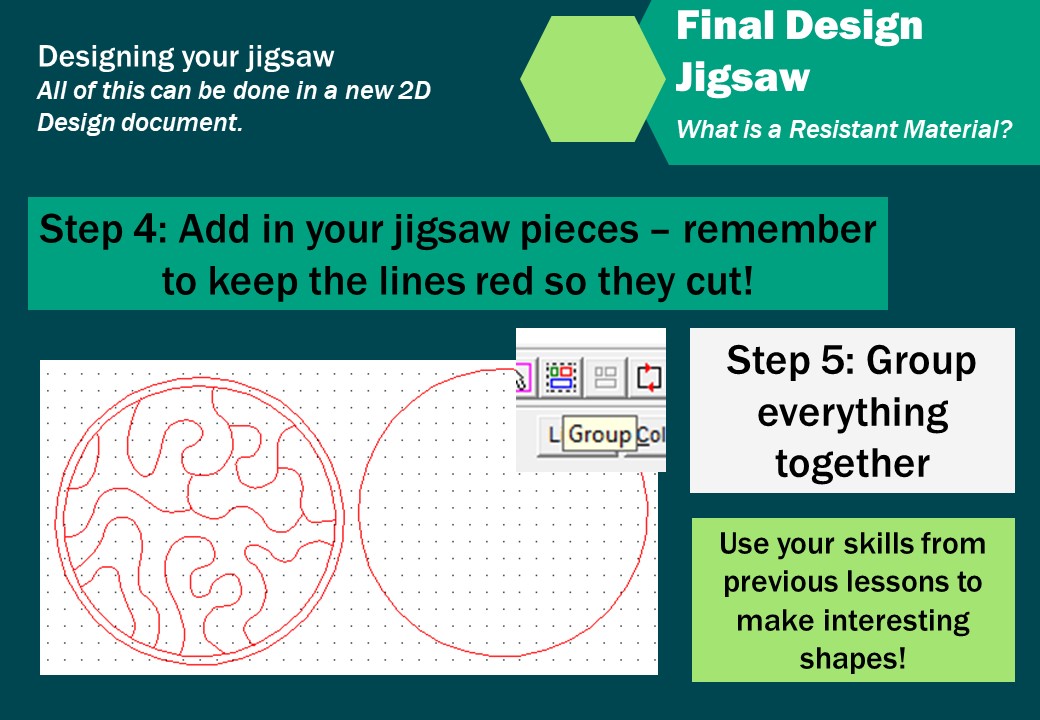
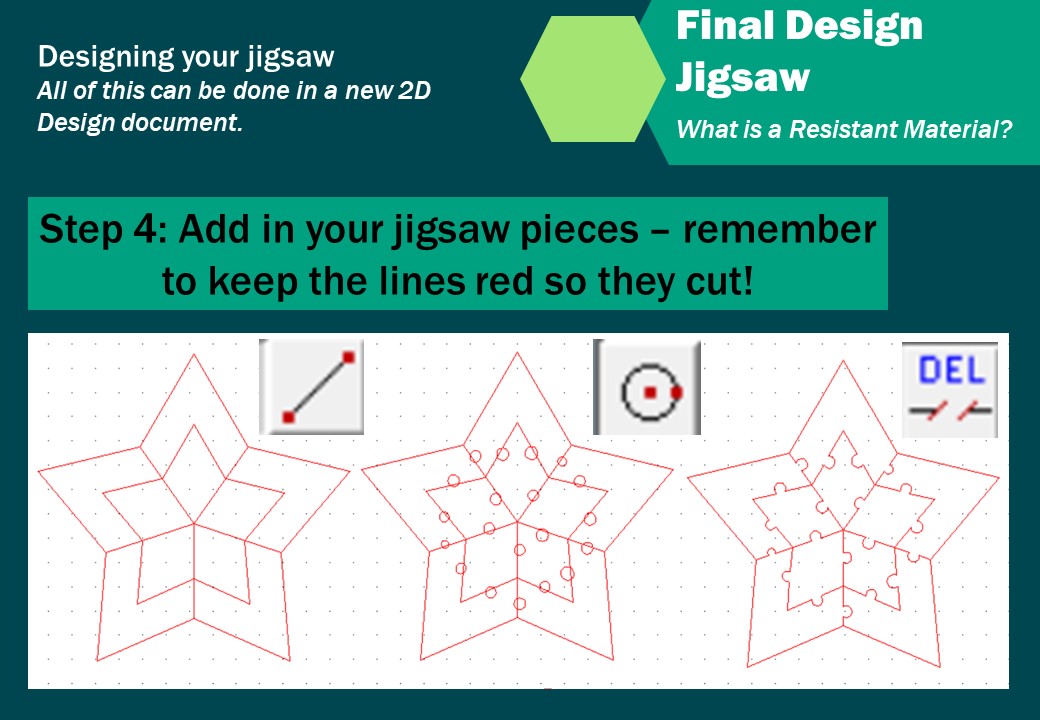
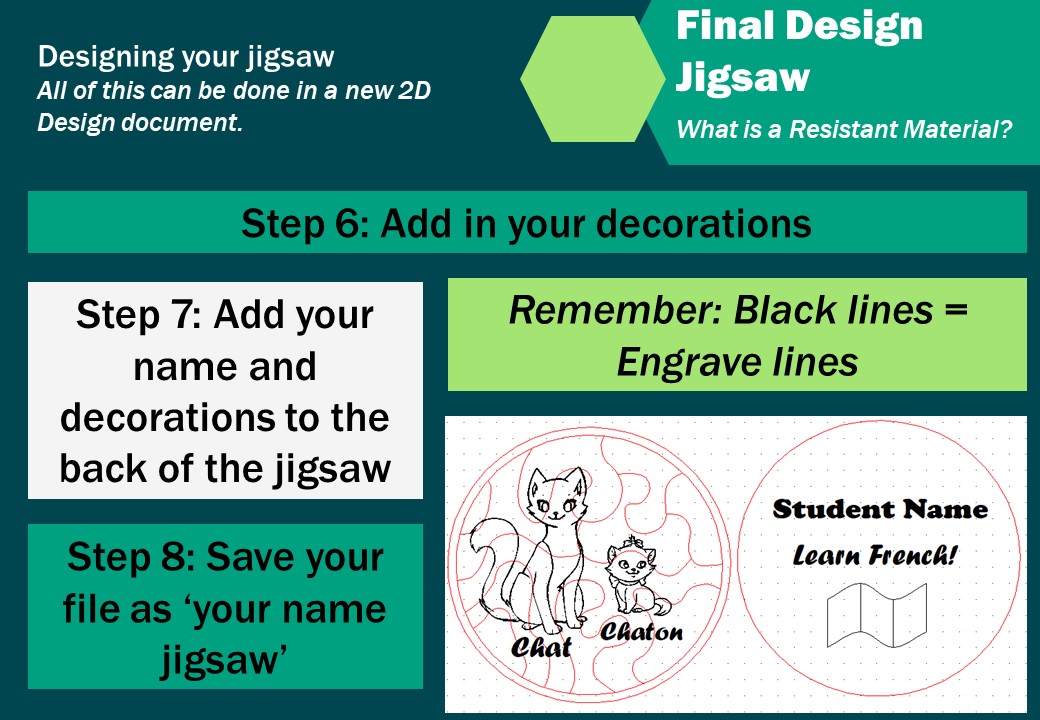
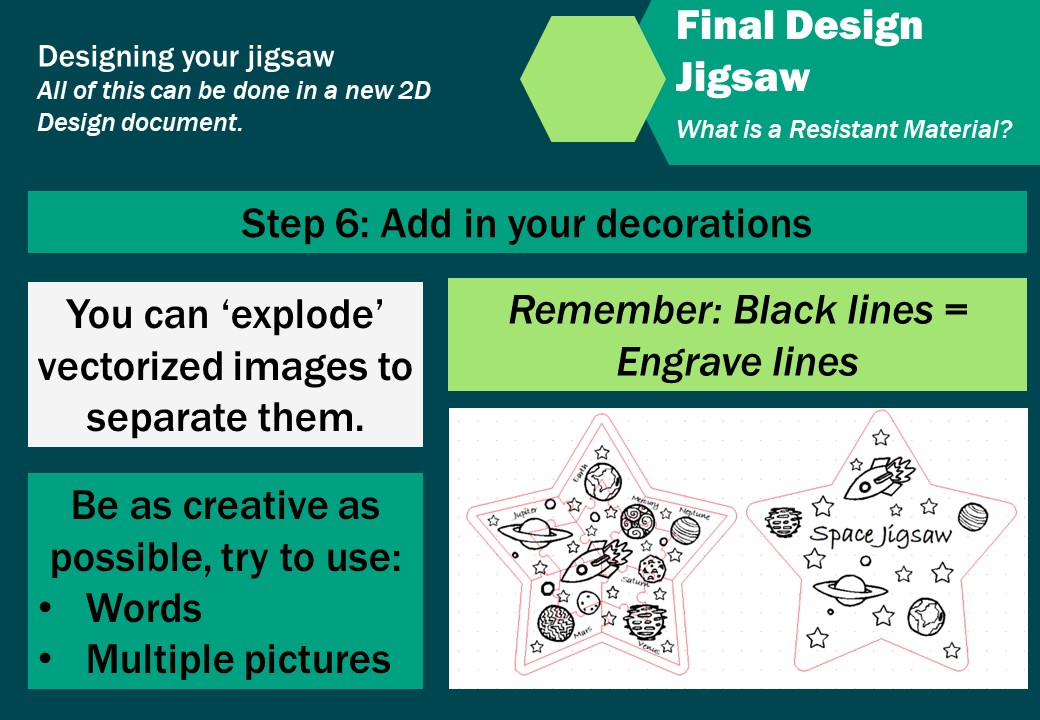
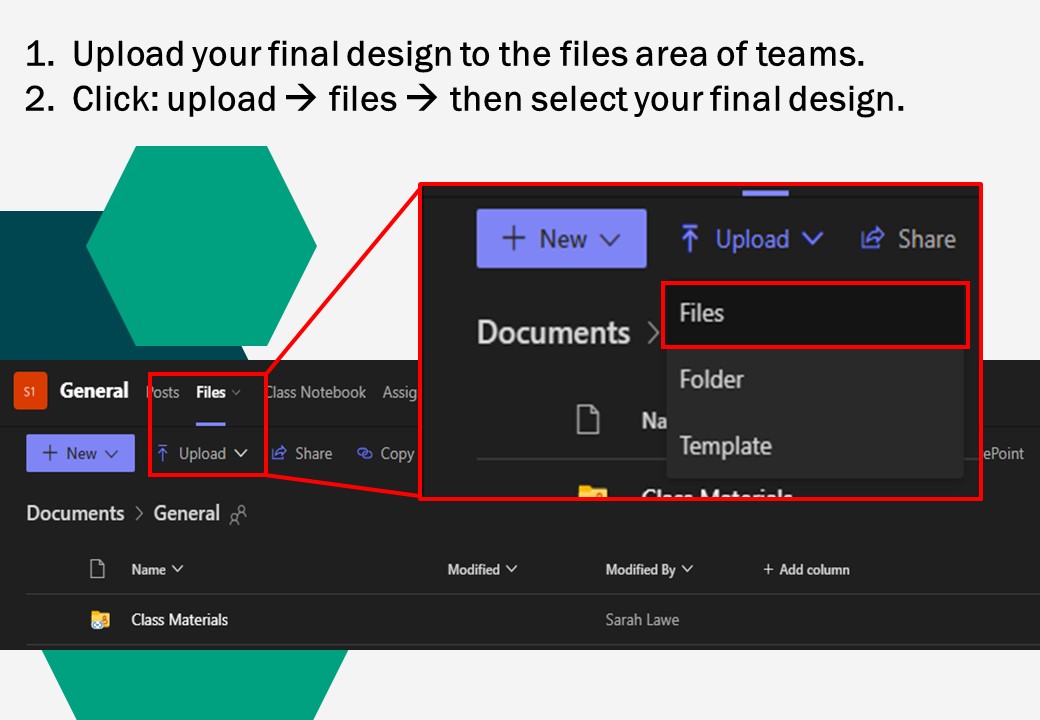
In this lesson, you will be applying all of the knowledge you have learned so far in this computer aided design and manufacture unit. You are now going to create your final jigsaw using Techsoft Design Tools, and submit it for manufacture. Use the tutorial below to help you with this, and look at the examples for inspiration!